RAN A-4G+ Skyhawk 2002

Monday, June 23, 2014
Gekko Graphics store now open!
Well, some pretty exciting news, for me at least, I have created a Gekko Graphics Store, located in the Pages column on the right hand side. In the Gekko Graphics store you will be able to purchase my “What If” side profile artwork available as a PDF digital download that can be then printed out on your home printer or sent to a commercial printer to be printed on whatever quality of paper you desire. The prints are A4 in size.
The Gekko Graphics store accepts Visa, MasterCard and PayPal.
I will slowly be adding more of my “What If” side profile art and real world stuff too as time permits as well as my existing decal sheets and hopefully this venture will allow me to finally get printed the sheets that I’ve had set to go for a while now!
So please support me in this new venture and hopefully I’ll be able to give back some new and interesting products.
Thank you.
Tuesday, February 11, 2014
TRUMPETER-AMMO Contest and my Me-262.
Well guys I managed to get my Trumpeter Me-262 fixed and finished just in time to enter the TRUMPETER-AMMO Contest. The page it is on can be found here:
https://www.facebook.com/media/set/?set=a.764166333597076.1073741842.413684768645236&type=1
and my pic can be found here:
https://www.facebook.com/photo.php?fbid=778762602137449&set=a.764166333597076.1073741842.413684768645236&type=3&theater
If you think it is worthy please vote for it, thanks!
Leading up to the completion of the weathering the wash must have eaten into the glue of the main undercarriage wheels as they both came off! To fix this I had to pull/break off the main undercarriage legs, then drill and pin them. Both for the wheel to undercarriage leg and undercarriage leg to fuselage joins! I nearly packed it in at that point as I don't have a very good selection of drills and basically had to expand the holes using a pointed file. Not very precise but it got the job done and once super glued back into place everything seems to be OK. Well, good enough to re-photograph at least and it is stable on its 'feet'.
So with that done it was time to get some good shots to enter into the competition with.
Thursday, January 23, 2014
What if Me-262 oil dot technique.
Finally I'm able to get back into the model room (which is outside) after the ridiculous heat we've had here in Adelaide, South Australia lately. On the hottest of the days it was 46 degrees Celsius!(That's 115 degrees Fahrenheit). There's no way you can model in heat like that.
Anyway I've decided to do a bit more of the oil dot technique. But! Just before getting stuck into that I decided to add a bit more of Sin Industries Grey filter on the wheels to give them that dusty feel, and guess what happened? The starboard main wheel fell off! Great!! Just as I'm almost ready to photograph it for the online comp, this happens!
Looks like the thinner in the mixture eat through the glue?
Oil dots on...........
Looks like the thinner in the mixture eat through the glue?
Oil dots on...........
Oil dots off.
Tomorrow I'll have a good look in the daylight to see if I need to tone down any of the marks left by the technique. I can see already that around the cannon ports there may be an issue?
So, now I have to drill, pin and re-glue the starboard main wheel and do the oil dot technique on the starboard side too.
It looks like Mig may well allow more time for us modellers struggling to get their models finished for the deadline. I hope so!
Tuesday, January 7, 2014
Some re-work on my Me-262.
Hi guys, I've decided to do some re-work on my Me-262 so I can enter it into the Trumpeter - AMMO contest:
https://www.facebook.com/media/set/?set=a.751838104829899.1073741841.413684768645236&type=1
So basically I'm doing a little more chipping, experimenting with some different types of chipping, doing some oil paint based fading techniques and a little staining and scuff marking with pencils and oil paint. I haven't finished yet, but I'd better get my act together and get it done so I can enter in time!!
Here's some pics..........
Monday, September 23, 2013
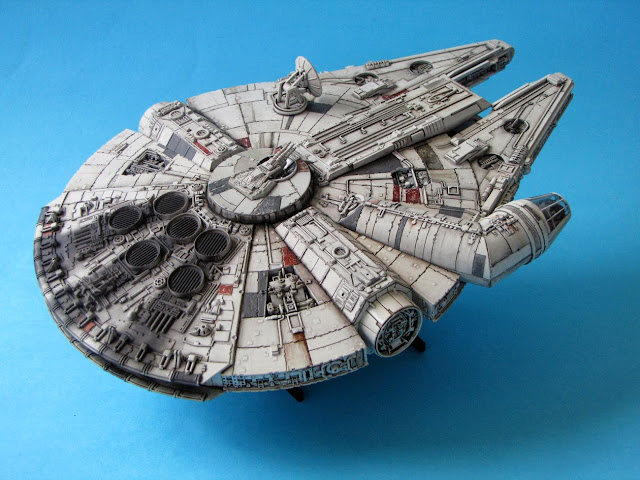
Millennium Falcon finished!
This is my 1/144th scale FineMolds Millennium Falcon. This is the first model in 6 years that I've managed to actually finnish!
Subscribe to:
Posts (Atom)


